

Installing Portainer
Installing Portainer
Docker Portainer Installation
Portainer is deployed as a lightweight Docker container on any Linux system running Docker. The main component of Portainer is Portainer Server, which is used to manage containers, networks, and environments. Portainer Agent is the component installed on another Docker system to enable communication with the server.
Follow the steps below to install Portainer and deploy a containerized app to test the installation.
Step 1: Create Docker Volume
Portainer stores information on a Docker volume. Type the following command to create a Docker volume for the Portainer Server:
docker volume create portainer_dataIf the operation is successful, the system outputs the name of the volume.

Step 2: Install Portainer Server
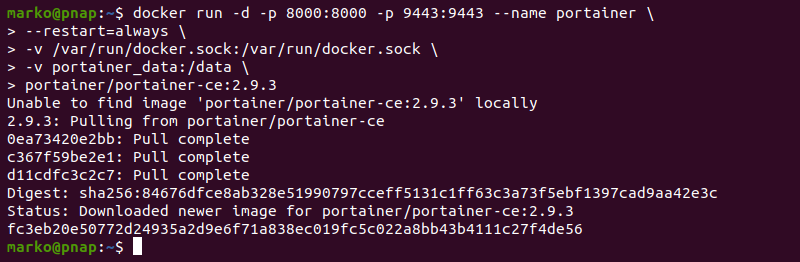
The latest Portainer Community Edition image is available on Docker Hub. Use the docker run command to pull the image and start a Portainer Server container:
docker run -d -p 8000:8000 -p 9443:9443 --name portainer \
	--restart=always \
	-v /var/run/docker.sock:/var/run/docker.sock \
	-v portainer_data:/data \
	portainer/portainer-ce:latest
Portainer exposes the UI via the secure port 9443. Port 8000 is used for edge computing and is optional unless you are planning to use edge agents.
Note: BMC offers affordable instances that satisfy all the performance requirements for edge computing.
docker run pulls the necessary images and starts the container. Check that Portainer is running by typing:
docker psThe command lists all the running containers. Find the container named portainer and make sure its status is Up.

Step 3: Access Portainer Dashboard
Portainer has a web UI accessible through an internet browser. To access the main Portainer dashboard:
- In a browser, visit the following address:
https://localhost:9443Note: If you receive a blank page with the Client sent an HTTP request to an HTTPS server message, make to explicitly state HTTPS as the connection type.
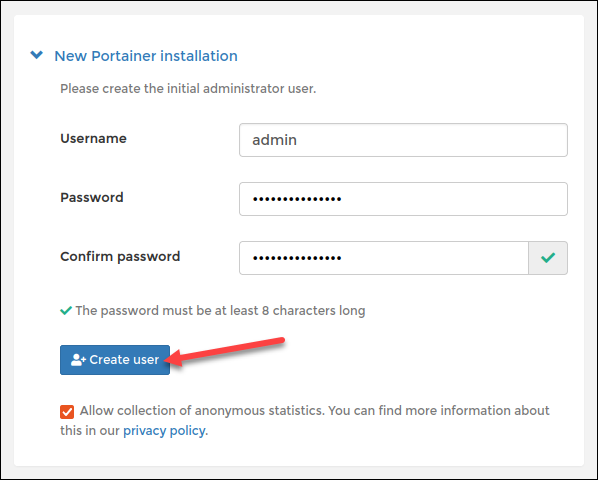
- The first time you access Portainer, the system asks to create a password for the admin user. Type the password twice and select the Create user button.
The Environment Wizard starts.
- Select the Get Started button to go to the dashboard and start using Portainer in the local environment only. To add other environments during the initial setup, click Add Environments.
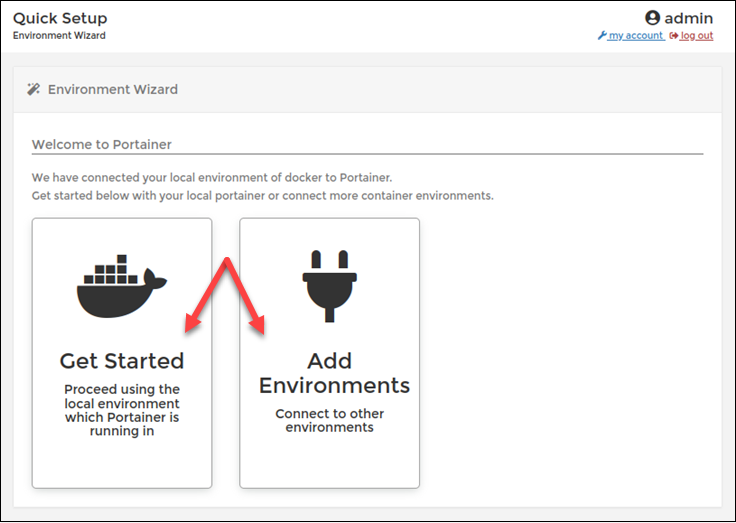
Note: You can add environments later from the Portainer dashboard.
Step 4 (Optional): Add More Environments to Portainer Installation
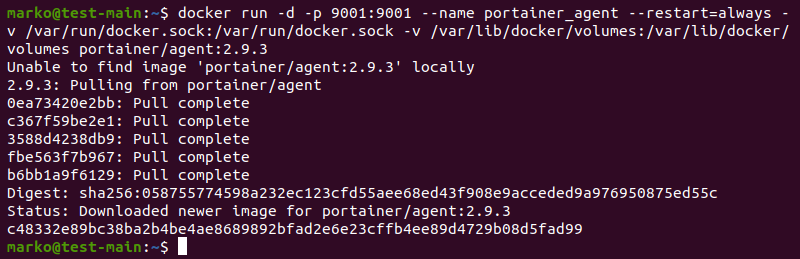
You can manage multiple Docker environments within the Portainer UI. Moreover, each environment needs to have a Portainer Agent instance installed. The agent then uses port 9001 to communicate with the server.
Follow the steps below to add an environment to Portainer.
- Type the following command to start a Portainer Agent container on the system you want to add:
docker run -d -p 9001:9001 --name portainer_agent --restart=always -v /var/run/docker.sock:/var/run/docker.sock -v /var/lib/docker/volumes:/var/lib/docker/volumes portainer/agent:2.9.3Wait for Docker to pull the necessary images and initiate the container.
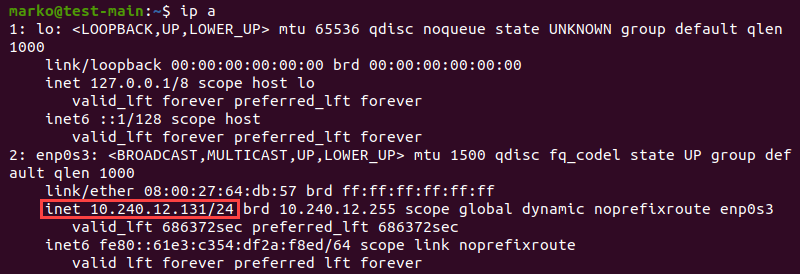
- To register the new environment in Portainer, you need the IP address of the system hosting the environment. If you do not know the IP, use the ip command to obtain it:
ip aThe command lists the network interfaces on your system. Make a note of the main interface's IP address.
Return to the Portainer Server UI.
- Select Environments in the menu on the left side and click Add environment.

Note: If you select the Add Environments button in Step 3, Portainer takes you directly to the Create Environment page.
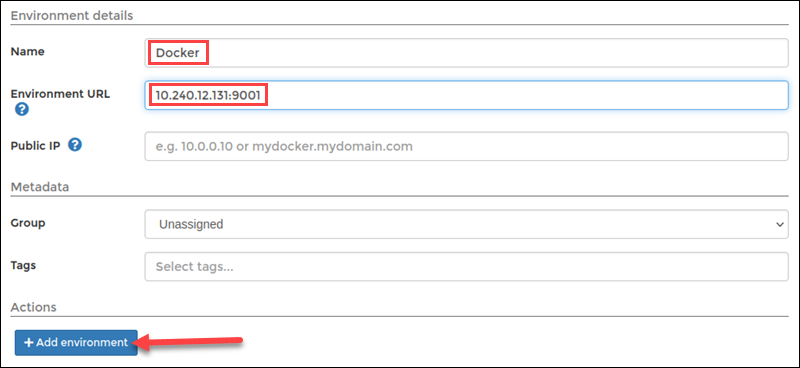
On the Create Environment page, fill in the details about the environment you want to add.
-
Write the name of the environment in the Name field
-
Type the URL of the system running Portainer Agent in the Environment URL field.
[ip-address]:9001- When you finish the setup, select the Add environment button in the Actions section.
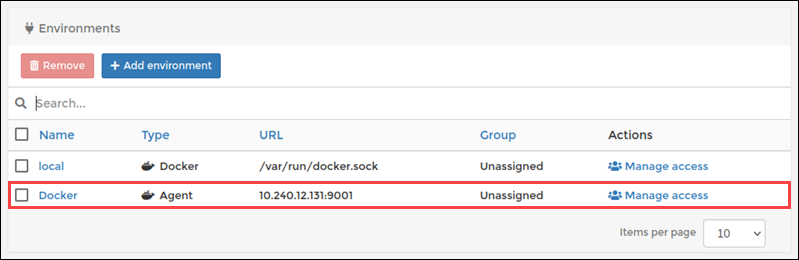
The new environment appears on the Environments page.
Step 5: Deploy Container Using Portainer
Test your Portainer setup by deploying a test Docker container. Follow the steps below to install an Apache HTTP Server instance.
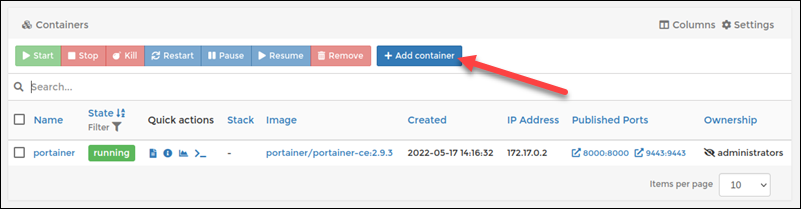
- Select Containers in the menu on the left side to open the Containers page.
- Click the Add container button in the action bar.
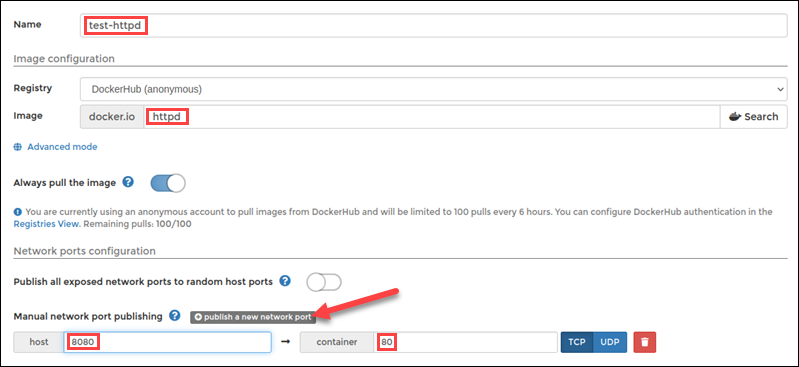
- Provide details for the container you want to run, including the container name, the image name, and the connection ports.
- When you finish setting up the container, scroll to the bottom of the page and select the Deploy the container button.
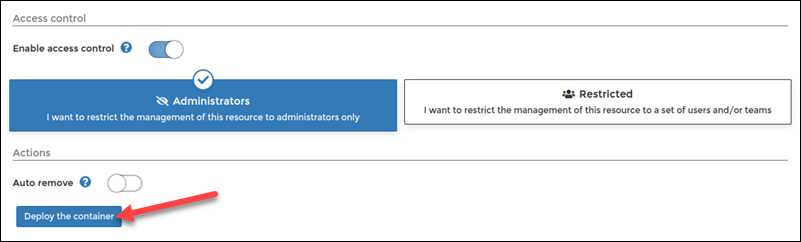
Wait for Portainer to deploy the container. When the container is ready, its state will be running.
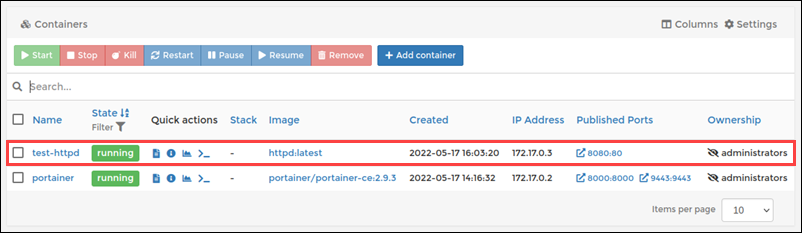
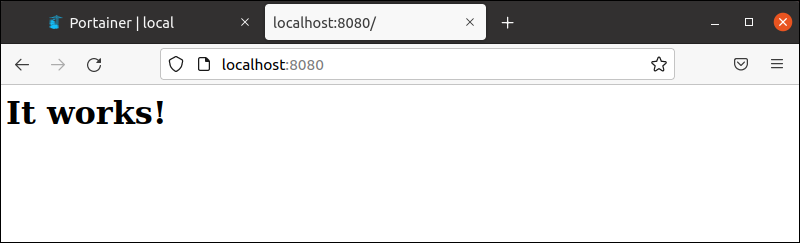
- Open another browser tab and type the IP address of your environment followed by the port assigned to the container. The Apache server shows the confirmation message.
Newsletter
If you liked this post, sign up to get updates in your email when I write something new! No spam ever.
Subscribe to the Newsletter